


How do I get tall, fluffy buttermilk biscuits with golden brown tops every time?

The Quest for Perfect Buttermilk Biscuits
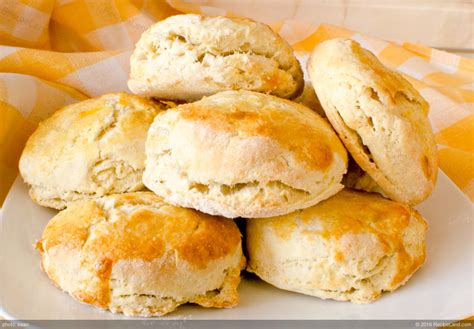
There’s nothing quite like a warm, fluffy buttermilk biscuit, its layers separating with ease, topped with a beautiful golden crust. But for many home bakers, this seemingly simple pastry can be elusive, often resulting in flat, dense, or pale biscuits. The good news? Perfection is absolutely achievable with a few critical techniques and a little baking science. Let’s unlock the secrets to consistently tall, tender, and golden-brown buttermilk biscuits.
1. The Cold Truth: Ingredients Matter Most
Your journey to biscuit mastery begins long before the oven preheats. The quality and temperature of your ingredients are paramount. Always use a good quality, unbleached all-purpose flour. But the real game-changers are cold butter and full-fat, fresh buttermilk.
Cold Butter: This is non-negotiable. Cold butter, cut into small pieces or grated, creates pockets of steam as it melts in the hot oven. These steam pockets are what give biscuits their characteristic lift and flaky layers. If your butter is too warm, it will incorporate too thoroughly into the flour, leading to a dense, cake-like texture.
Buttermilk: Full-fat buttermilk provides both flavor and tenderness. Its acidity reacts with baking soda to provide additional leavening, contributing to that coveted height and fluffy texture. Ensure your buttermilk is also cold.

2. Master the Mix, Don’t Overmix
The cardinal rule of biscuit dough is minimal handling. Overmixing develops the gluten in the flour, resulting in tough biscuits. Your goal is to combine the ingredients just enough.
- Start by whisking your dry ingredients (flour, baking powder, baking soda, salt) thoroughly.
- Cut in the cold butter using a pastry blender, your fingertips, or a food processor on a pulse setting. Work quickly until the mixture resembles coarse meal with some pea-sized chunks of butter remaining. These chunks are key!
- Pour in the cold buttermilk all at once. Mix with a fork or your hands until just combined. The dough will look shaggy and sticky. That’s exactly what you want. Resist the urge to knead it smooth.
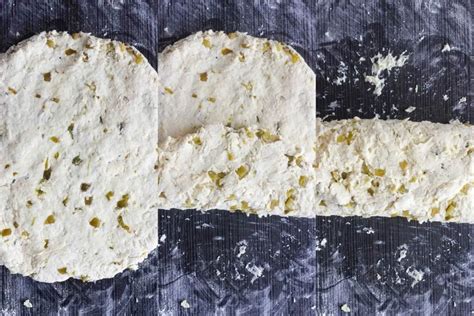
3. The Lamination Secret: Folding for Fluff
This is where tall, distinct layers are born. Instead of traditional kneading, you’ll use a gentle folding technique similar to laminating pastry dough. This creates multiple thin layers of dough separated by butter, which will puff up magnificently in the oven.
Turn the shaggy dough out onto a lightly floured surface. Gently pat it into a rough rectangle. Fold one-third of the dough over the middle, then fold the remaining third over that, like folding a letter. Rotate the dough 90 degrees and repeat this pat-and-fold process 2-3 more times. This builds layers without developing gluten.
4. The Cut: Straight Down and No Twist
Once your dough is gently laminated and patted to your desired thickness (typically 1/2 to 3/4 inch), it’s time to cut the biscuits. Use a sharp biscuit cutter, pressing straight down without twisting. Twisting seals the edges of the biscuit, preventing it from rising to its full potential.
For maximum height, place the cut biscuits close together on a baking sheet. This creates a steamy environment that helps them rise even taller. For crispier sides, space them farther apart.

5. Oven Dynamics: Heat and Placement
A hot oven is crucial for that initial burst of steam and rapid rise. Preheat your oven to a high temperature, typically 425-450°F (220-230°C). Make sure it’s fully preheated, and consider placing the biscuits on a preheated baking sheet or even a pizza stone for extra bottom crispness.
Bake on the middle rack. The high heat sets the crust quickly while the interior bakes through, creating a light, airy crumb. Baking time will vary but generally ranges from 12-18 minutes, depending on the size and thickness of your biscuits.
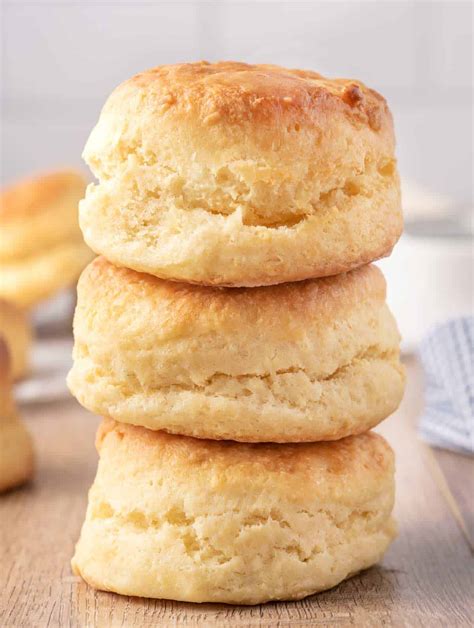
6. The Golden Touch: Achieving Perfect Tops
To achieve that irresistible golden-brown top, a little preparation goes a long way. Just before baking, you can brush the tops of your biscuits with a little melted butter, milk, or extra buttermilk. This promotes even browning and adds to the rich flavor.
For an extra shiny, deeply golden crust, brush with melted butter again immediately after they come out of the oven. The residual heat will absorb the butter, creating a beautiful sheen and enhancing the flavor.

Conclusion: Biscuit Bliss Awaits
With these techniques in your arsenal – cold ingredients, gentle mixing, strategic folding, proper cutting, and a hot oven – you’re well on your way to consistently baking tall, fluffy buttermilk biscuits with beautiful golden-brown tops. Practice makes perfect, so don’t be discouraged if your first batch isn’t absolute perfection. Each attempt will bring you closer to mastering this beloved Southern staple. Enjoy them warm, slathered with butter, jam, or as the perfect accompaniment to a hearty meal!