What’s the secret to truly crispy, flavorful Midwest fried chicken, not greasy?

Midwest fried chicken holds a special place in the hearts of many, revered for its golden-brown, shatteringly crisp crust and juicy, tender interior. Yet, achieving this perfection at home often feels like chasing a culinary unicorn – especially when battling the dreaded greasy outcome. Fear not, home cooks! The secret lies not in a single magical ingredient, but in a series of thoughtful steps and precise techniques.
The Foundation: Buttermilk Brine and Seasoning
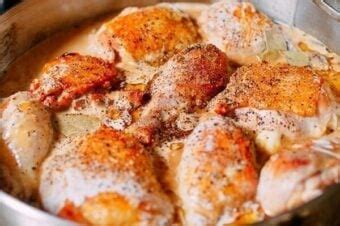
The journey to exceptional fried chicken begins long before it hits the hot oil. A foundational step for both flavor and tenderness is a proper buttermilk brine. Buttermilk’s lactic acid naturally tenderizes the chicken without breaking down the proteins too much, while its subtle tang adds a layer of flavor that plain milk or water simply can’t. Infuse your buttermilk with plenty of seasonings – salt, black pepper, garlic powder, onion powder, a pinch of cayenne, and even some dried herbs like thyme or sage. Allow the chicken to marinate for at least 4 hours, or ideally, overnight in the refrigerator. This isn’t just about tenderness; it’s about building flavor from the inside out.
The Coating: Achieving the Ultimate Crunch
A truly crispy crust requires a well-seasoned, multi-textured dredge. While all-purpose flour is the base, consider adding a small amount of cornstarch or even baking powder. Cornstarch contributes to a lighter, crispier texture, and baking powder can help create tiny air bubbles in the coating, leading to an even more satisfying crunch. Crucially, season your flour mixture generously with the same spices used in your brine, ensuring every bite is bursting with flavor. After removing the chicken from the brine (letting excess drip off), press it firmly into the flour mixture, ensuring every crevice is coated. For an extra craggy crust, some chefs advocate for a ‘double dip’ – a quick dip back into the buttermilk (or even just the residual moisture from the first flouring) followed by a second coating of flour.
The Fry: Temperature Control is King
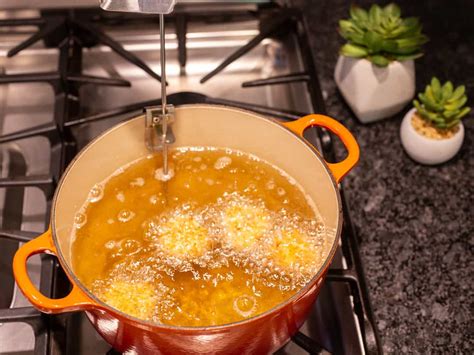
This is arguably the most critical step in preventing greasy fried chicken. Greasy chicken is almost always a result of oil that isn’t hot enough. When chicken enters oil that is too cool, the coating absorbs the oil before it has a chance to crisp up, leading to a soggy, greasy mess. Maintain an oil temperature between 325-350°F (160-175°C). Use a heavy-bottomed pot or a Dutch oven, and invest in a reliable thermometer. Peanut oil, vegetable oil, or canola oil are excellent choices due to their high smoke points. Fry the chicken in batches, being careful not to overcrowd the pot, which will inevitably drop the oil temperature. Frying in smaller batches ensures the oil stays hot and the chicken cooks evenly.
The Double Fry (For Next-Level Crispiness)
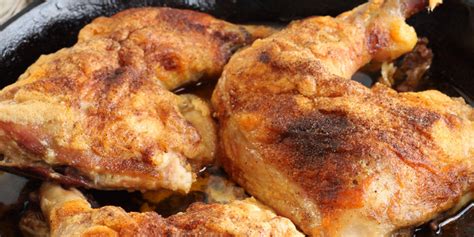
While optional, a double-fry technique is a game-changer for unparalleled crispiness and helps to ensure the chicken is cooked through without burning the exterior. First, fry the chicken at a slightly lower temperature, around 300-325°F (150-160°C), until it’s cooked most of the way through and lightly golden, about 8-10 minutes per side depending on the piece. Remove the chicken and let it rest on a wire rack for 5-10 minutes. Then, increase the oil temperature to 350-375°F (175-190°C) and return the chicken to the hot oil for a final 2-4 minutes, or until deeply golden brown and incredibly crisp. This second, hotter fry drives out any remaining moisture from the coating and creates that irresistible crunch.
Post-Fry Care: The Unsung Hero
Once fried, resist the urge to place your chicken directly onto paper towels. While paper towels absorb excess oil, they also trap steam, which can make your beautifully crisp crust soggy. Instead, transfer the hot chicken to a wire rack set over a baking sheet. This allows air to circulate around the pieces, preserving their crispiness. Immediately after removing the chicken from the oil, give it another light sprinkle of salt or your preferred seasoning blend. The heat from the chicken will help the seasonings adhere and bloom, enhancing the overall flavor.
Beyond the Basics: Expert Tips
- Don’t Rush the Brine: The longer the brine, the more flavorful and tender your chicken will be.
- Use a Thermometer: Both for oil temperature and checking the internal temperature of the chicken (165°F/74°C for doneness).
- Rest the Chicken: After frying, let the chicken rest for a few minutes on the wire rack before serving. This allows the juices to redistribute, resulting in a more tender and moist piece.
- Start with Quality Chicken: Free-range or organic chicken often has better flavor and texture.
With these secrets in hand – from the tangy buttermilk brine and the perfectly seasoned dredge to precise temperature control and thoughtful post-fry care – you’re well on your way to mastering truly crispy, flavorful, and gloriously non-greasy Midwest fried chicken. Prepare for accolades!