


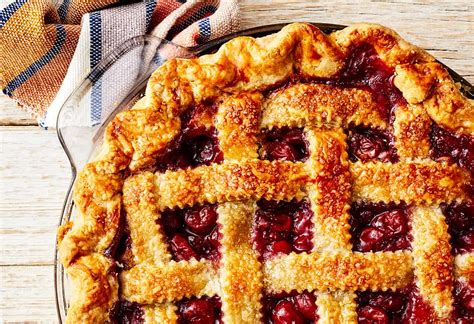
How to get a perfectly flaky pie crust? Avoid soggy bottoms for your big-flavor pies!

The Quest for the Perfect Pie Crust: Flaky Top, Firm Bottom
There’s nothing quite like a homemade pie, but the difference between a good pie and a truly unforgettable one often lies in its foundation: the crust. That delicate, shatteringly flaky texture on top, coupled with a firm, golden bottom that stands up to a juicy filling, is the ultimate goal for any baker. Unfortunately, many home bakers face the frustration of a tough crust or, even worse, a soggy bottom. Fear not! With a few essential techniques and a bit of patience, you can master the art of the perfect pie crust.
The Pillars of a Flaky Crust
1. Temperature is Your Best Friend (and Enemy)
The golden rule for flaky pie crusts is simple: keep everything cold. Cold butter or fat, cold water, and even cold hands (if possible!) are crucial. When tiny pieces of cold fat hit the hot oven, they release steam, creating air pockets that result in those coveted flaky layers. If your fat melts before baking, it will be absorbed by the flour, leading to a tough, dense crust.
Dice your butter or solid shortening into small pieces and chill it thoroughly in the freezer for 15-20 minutes before use. Ensure your water is ice-cold, perhaps with a few ice cubes, though you’ll remove them before measuring. Even chilling your mixing bowl and flour can make a difference on a warm day.

2. The Art of Not Overworking
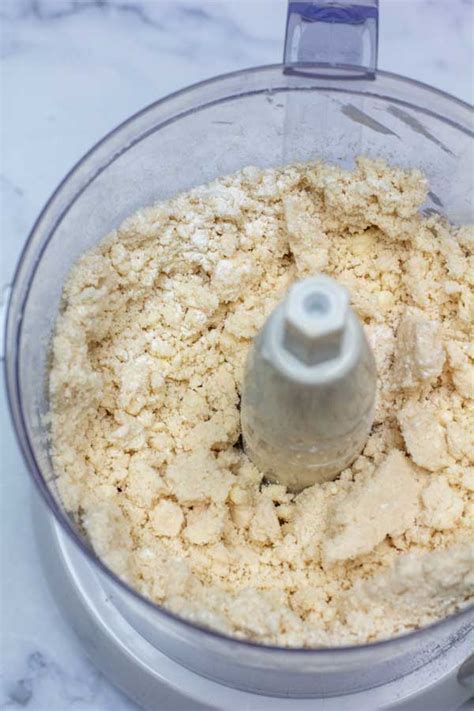
Once you add water to your flour and fat mixture, gluten development begins. While gluten provides structure, too much of it will result in a tough, elastic crust rather than a tender, flaky one. Your goal is to mix the dough just enough to bring it together, but no more.
Use a light touch, whether you’re using a pastry blender, your fingertips, or a food processor. Stop mixing as soon as the dough barely holds together. You should still see visible streaks of butter throughout the dough – these are the keys to flakiness!
3. The Right Fat for the Job
Different fats yield different results. Butter provides superior flavor and a crisp, delicate flakiness. Shortening creates an incredibly tender and flaky crust, often easier to work with, but lacks butter’s rich flavor. Lard offers exceptional flakiness and tenderness with a unique, savory depth, though it’s less commonly used today.
Many bakers opt for a combination of butter and shortening to get the best of both worlds: great flavor and excellent workability/flakiness. Experiment to find your personal preference!
Conquering the Soggy Bottom Syndrome
A soggy bottom is the bane of many pie makers. It occurs when the crust absorbs moisture from the filling before it has a chance to fully cook and crisp up. Here’s how to fight back:
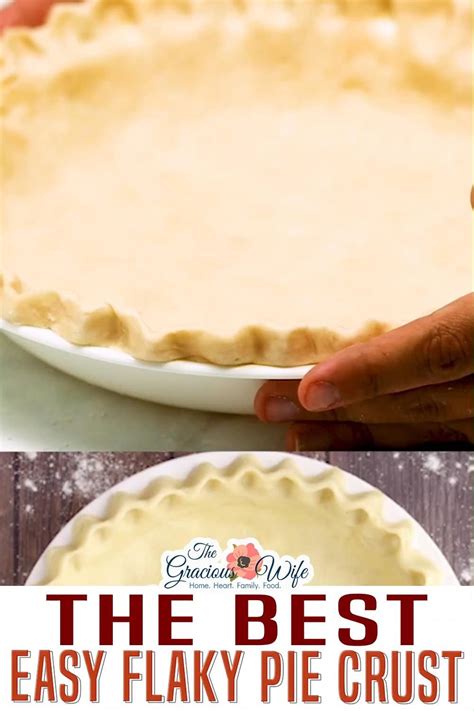
1. The Magic of Blind Baking (or Pre-baking)
For wet fillings like custard, quiches, or fruit pies with high moisture content, blind baking (or pre-baking) your crust is often non-negotiable. This involves partially or fully baking the crust before adding the filling.
To blind bake: line your chilled pie crust with parchment paper, fill it with pie weights, dried beans, or rice, and bake until the edges are set. Remove the weights and paper, then continue baking until the bottom is pale gold for partial baking, or fully golden brown for full baking. This creates a barrier and gives the crust a head start.

2. Barrier Methods and Hot Temperatures
Beyond blind baking, consider these preventative measures:
- Egg Wash: For partially blind-baked crusts, brush the bottom with a thin layer of beaten egg white or whole egg immediately after removing the weights and before further baking. This creates a protein barrier that seals the crust.
- Breadcrumbs/Crushed Cereal: A thin layer of dry breadcrumbs, crushed cornflakes, or even ground nuts sprinkled on the bottom of an unbaked or partially baked crust can absorb excess moisture.
- Hot Oven & Lower Rack: Always preheat your oven thoroughly. Baking on the lowest rack ensures direct heat to the bottom of the pie, promoting a crisp crust.
3. Don’t Forget to Chill
After forming your pie crust and placing it in the pie plate, chill it again for at least 30 minutes (or even longer) before baking. This allows the gluten to relax, preventing shrinkage, and re-solidifies the fat, which is essential for flakiness and helps the crust hold its shape against the heat.
Bringing It All Together
Achieving that perfectly flaky, non-soggy pie crust is a combination of understanding the science and practicing the technique. Remember: cold ingredients, minimal handling, and strategic blind baking are your secret weapons. Don’t be discouraged by initial attempts; every pie you make brings you closer to mastering this essential baking skill. Soon, you’ll be proudly serving up big-flavor pies, complete with the crust they truly deserve!