


How do I layer ingredients in my dutch oven for big flavor & even cooking?

The Dutch oven is a culinary workhorse, celebrated for its ability to transform simple ingredients into rich, comforting one-pot meals. However, simply tossing everything in can lead to unevenly cooked food and muddled flavors. The secret to big flavor and even cooking lies in understanding the science and art of layering your ingredients.
Why Layering Matters in Your Dutch Oven
Layering isn’t just about aesthetics; it’s a strategic approach that leverages heat distribution, manages moisture, and builds flavor depth. Proper layering ensures that ingredients requiring more heat or longer cooking times are placed closer to the heat source, while delicate items are protected or added later. It also allows flavors to meld progressively rather than simply mixing all at once.
The Foundational Layer: Building Your Flavor Base
Every great Dutch oven meal starts with a strong foundation. This typically involves fats and aromatics:
- Fats: Begin with a tablespoon or two of olive oil, butter, or another cooking fat. This provides the medium for sautéing and helps transfer heat.
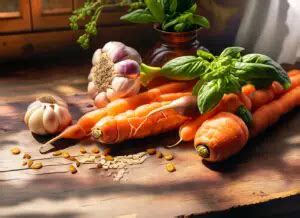
- Aromatics: Next come your aromatics – onions, garlic, celery, carrots (mirepoix). These need direct contact with the hot fat and bottom of the Dutch oven to soften, sweeten, and release their fragrant compounds, creating the base layer of flavor. Cook these until tender and fragrant before moving on.
Proteins and Browning: The Heart of Your Dish
After your aromatics are fragrant, it’s time for proteins. If your recipe calls for browning meat (beef, chicken, pork), this is the crucial next step. Brown your protein in batches to avoid overcrowding, ensuring a beautiful crust forms. This crust, known as the Maillard reaction, is packed with umami flavor. Deglaze the pot with a splash of wine, broth, or water after browning to scrape up all those flavorful fond bits from the bottom – this is liquid gold for your sauce!
Once browned, proteins can be placed back into the Dutch oven, often nestled among the aromatics.
Dense Vegetables and Legumes: Setting the Pace
Ingredients that require longer cooking times, such as root vegetables (potatoes, sweet potatoes, parsnips) or dried legumes (beans, lentils that haven’t been pre-cooked), should be added after proteins, or even alongside them, depending on the recipe. They can sit directly in the cooking liquid, allowing them ample time to soften and absorb flavors.

Liquids and Spices: Infusing the Core
Once your main solids are in place, add your liquids (broth, stock, canned tomatoes, wine) and spices. The liquid level is important – it should typically cover most of your main ingredients but leave some exposed for roasting and caramelization, especially if you’re aiming for a slightly thicker sauce. Stir in your dried herbs and spices now, allowing them to bloom in the hot liquid and infuse the entire dish as it simmers.
Mid-Cook Additions: Delicate Vegetables and Fresh Herbs
Not everything should go in at the beginning. Quicker-cooking vegetables, like bell peppers, zucchini, green beans, or leafy greens (spinach, kale), should be added towards the middle or end of the cooking process. This prevents them from becoming mushy and helps them retain their vibrant color and texture. Fresh herbs, such as parsley, cilantro, or basil, are usually stirred in during the last few minutes or used as a garnish after cooking to preserve their delicate flavors and aromas.
Top Layers and Finishing Touches
For dishes that include grains like rice or pasta, these are often added later in the cooking process, usually with additional liquid, to cook directly in the pot. They typically form the top layer, simmering in the steam and liquid. Finally, consider any garnishes – a sprinkle of cheese, a dollop of sour cream, or extra fresh herbs – that will be added just before serving.

Practical Tips for Layering Success
- Don’t Overcrowd: Give your ingredients space to cook evenly. Overcrowding can steam ingredients instead of browning them, and lead to uneven cooking.
- Pre-Prep is Key: Have all your ingredients chopped and ready before you start. This makes layering a smooth, logical process.
- Know Your Ingredients: Understand the cooking times of your various components. This intuition will guide your layering decisions.
- Adjust as You Go: Dutch oven cooking is forgiving. If you realize an ingredient needs more time, you can always gently stir it down into the liquid.
By consciously layering your ingredients, you’re not just cooking; you’re orchestrating a symphony of flavors and textures. This thoughtful approach transforms your Dutch oven from a simple pot into a masterful tool for creating truly unforgettable one-pot meals.